How to create a real world elevation map in Gazebo
We will create a 3D model in Blender using BlenderGIS plugin and elevation data from opentopography.org. We will then export the model as a .dae file and a texture as .tif to be used in Gazebo. Finally, we will create a simple Gazebo .world to view the created model.
1. Getting Blender and the plugin
Download BlenderGIS plugin as zip
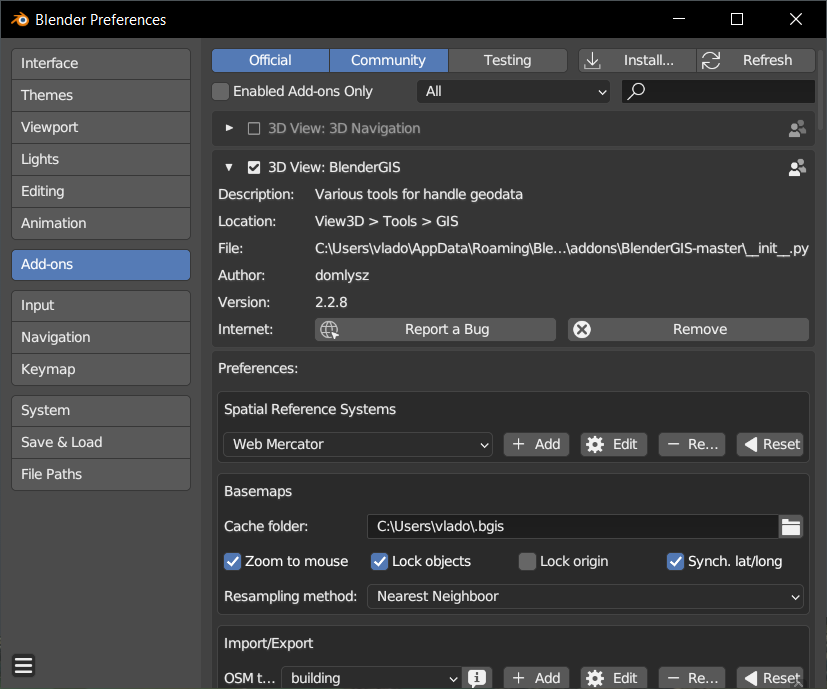
In Blender, go to Edit -> Preferences -> Add-ons -> Install and select the downloaded zip file

The plugin should now appear in the addons list. Make sure it’s enabled (checkbox is checked).
2. Creating the textured plane
Once the plugin is installed, you should see the GIS button available. Press it, then select Web geodata -> Basemap
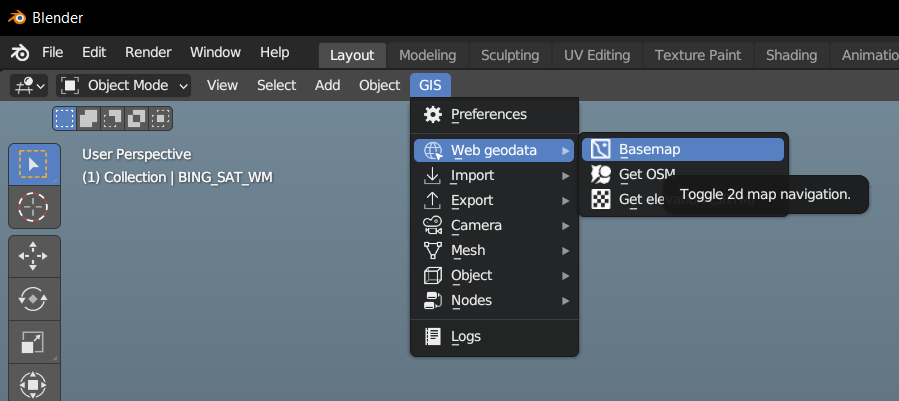
You can change the source (for example to use Bing maps) if you want. Press OK.
The 2D map view should appear. You can drag the map and zoom to go the location you want, or you can press G to then enter a specific location.
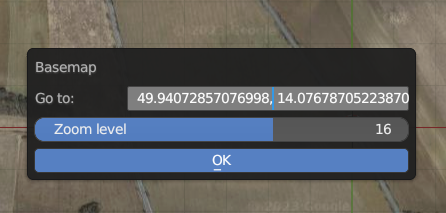
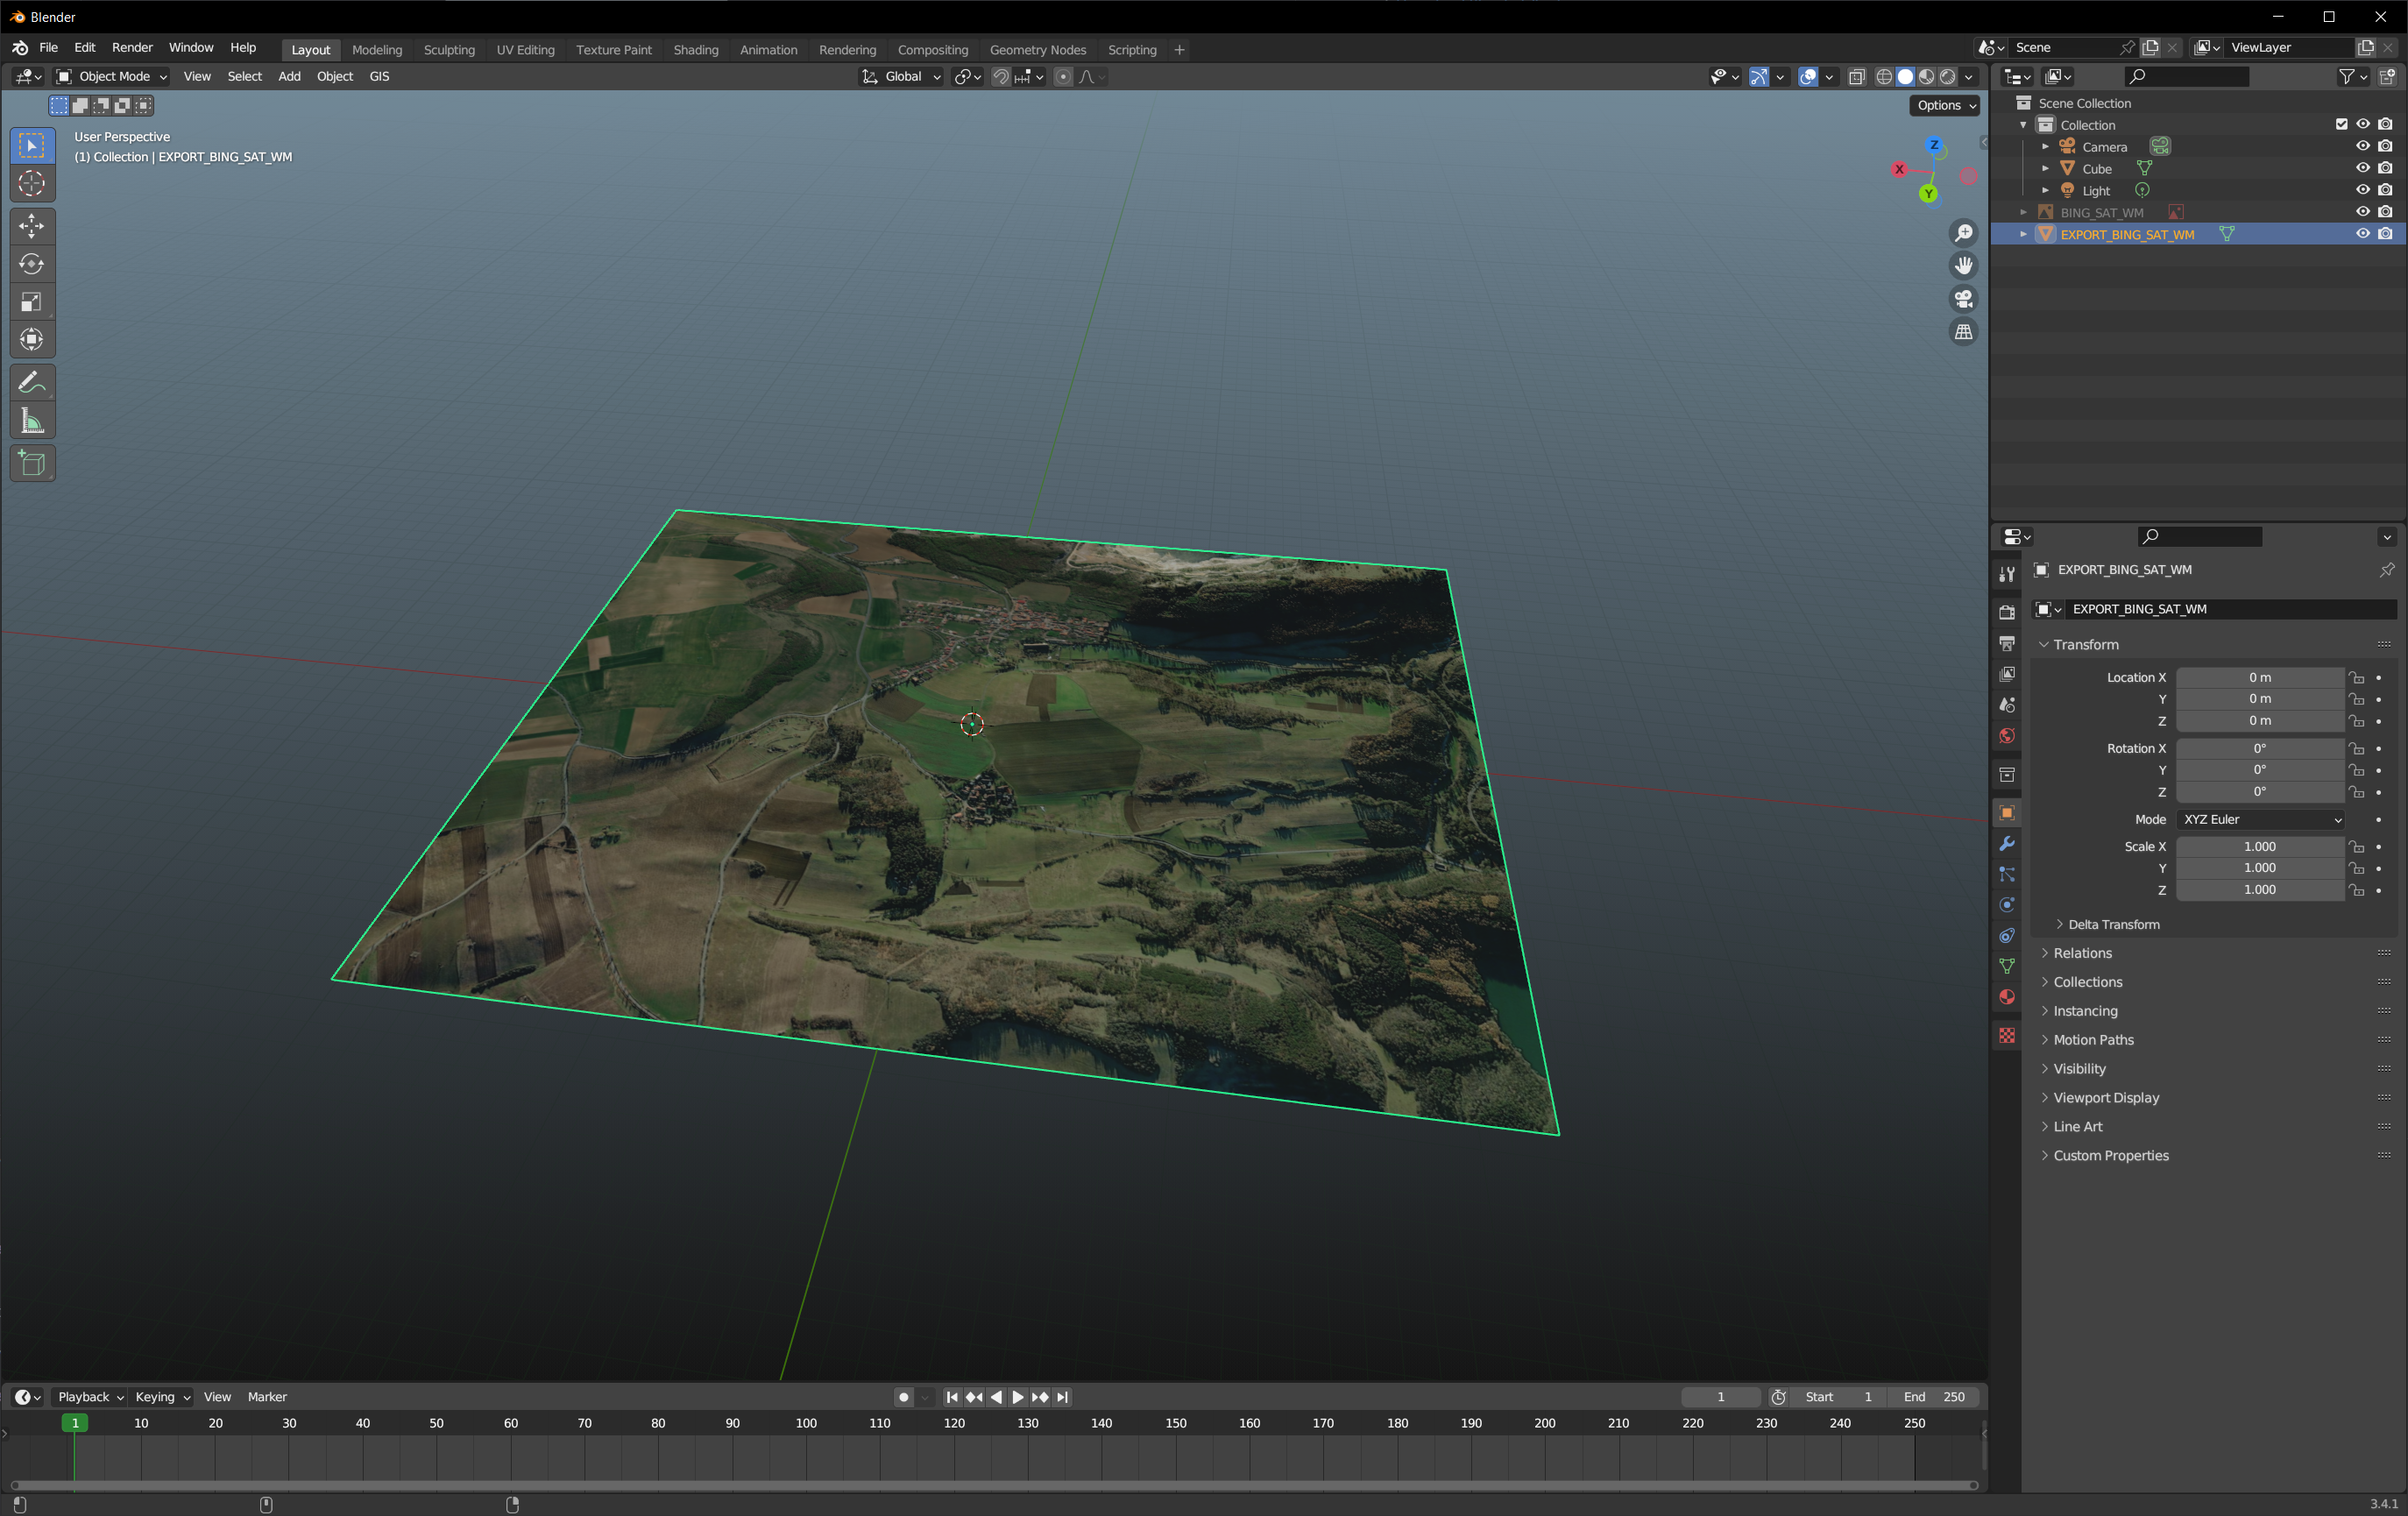
Once you’re satisfied with the location and zoom level, press E to create a new plane with the texture applied to it.
3. Adding elevation data
To import the elevation data, we use OpenTopography API. We will need an API key to feed into the plugin. It’s free.
Got to OpenTopography
Create an account. Select Affiliation: Academia, Organization: Czech Technical University in Prague.
Then login with the created account. You should see the API key here
Now in Blender, select the plane object we’ve created.
Go to GIS -> Web geodata -> Get elevation (SRTM). Enter the API key and press OK. This takes some time. 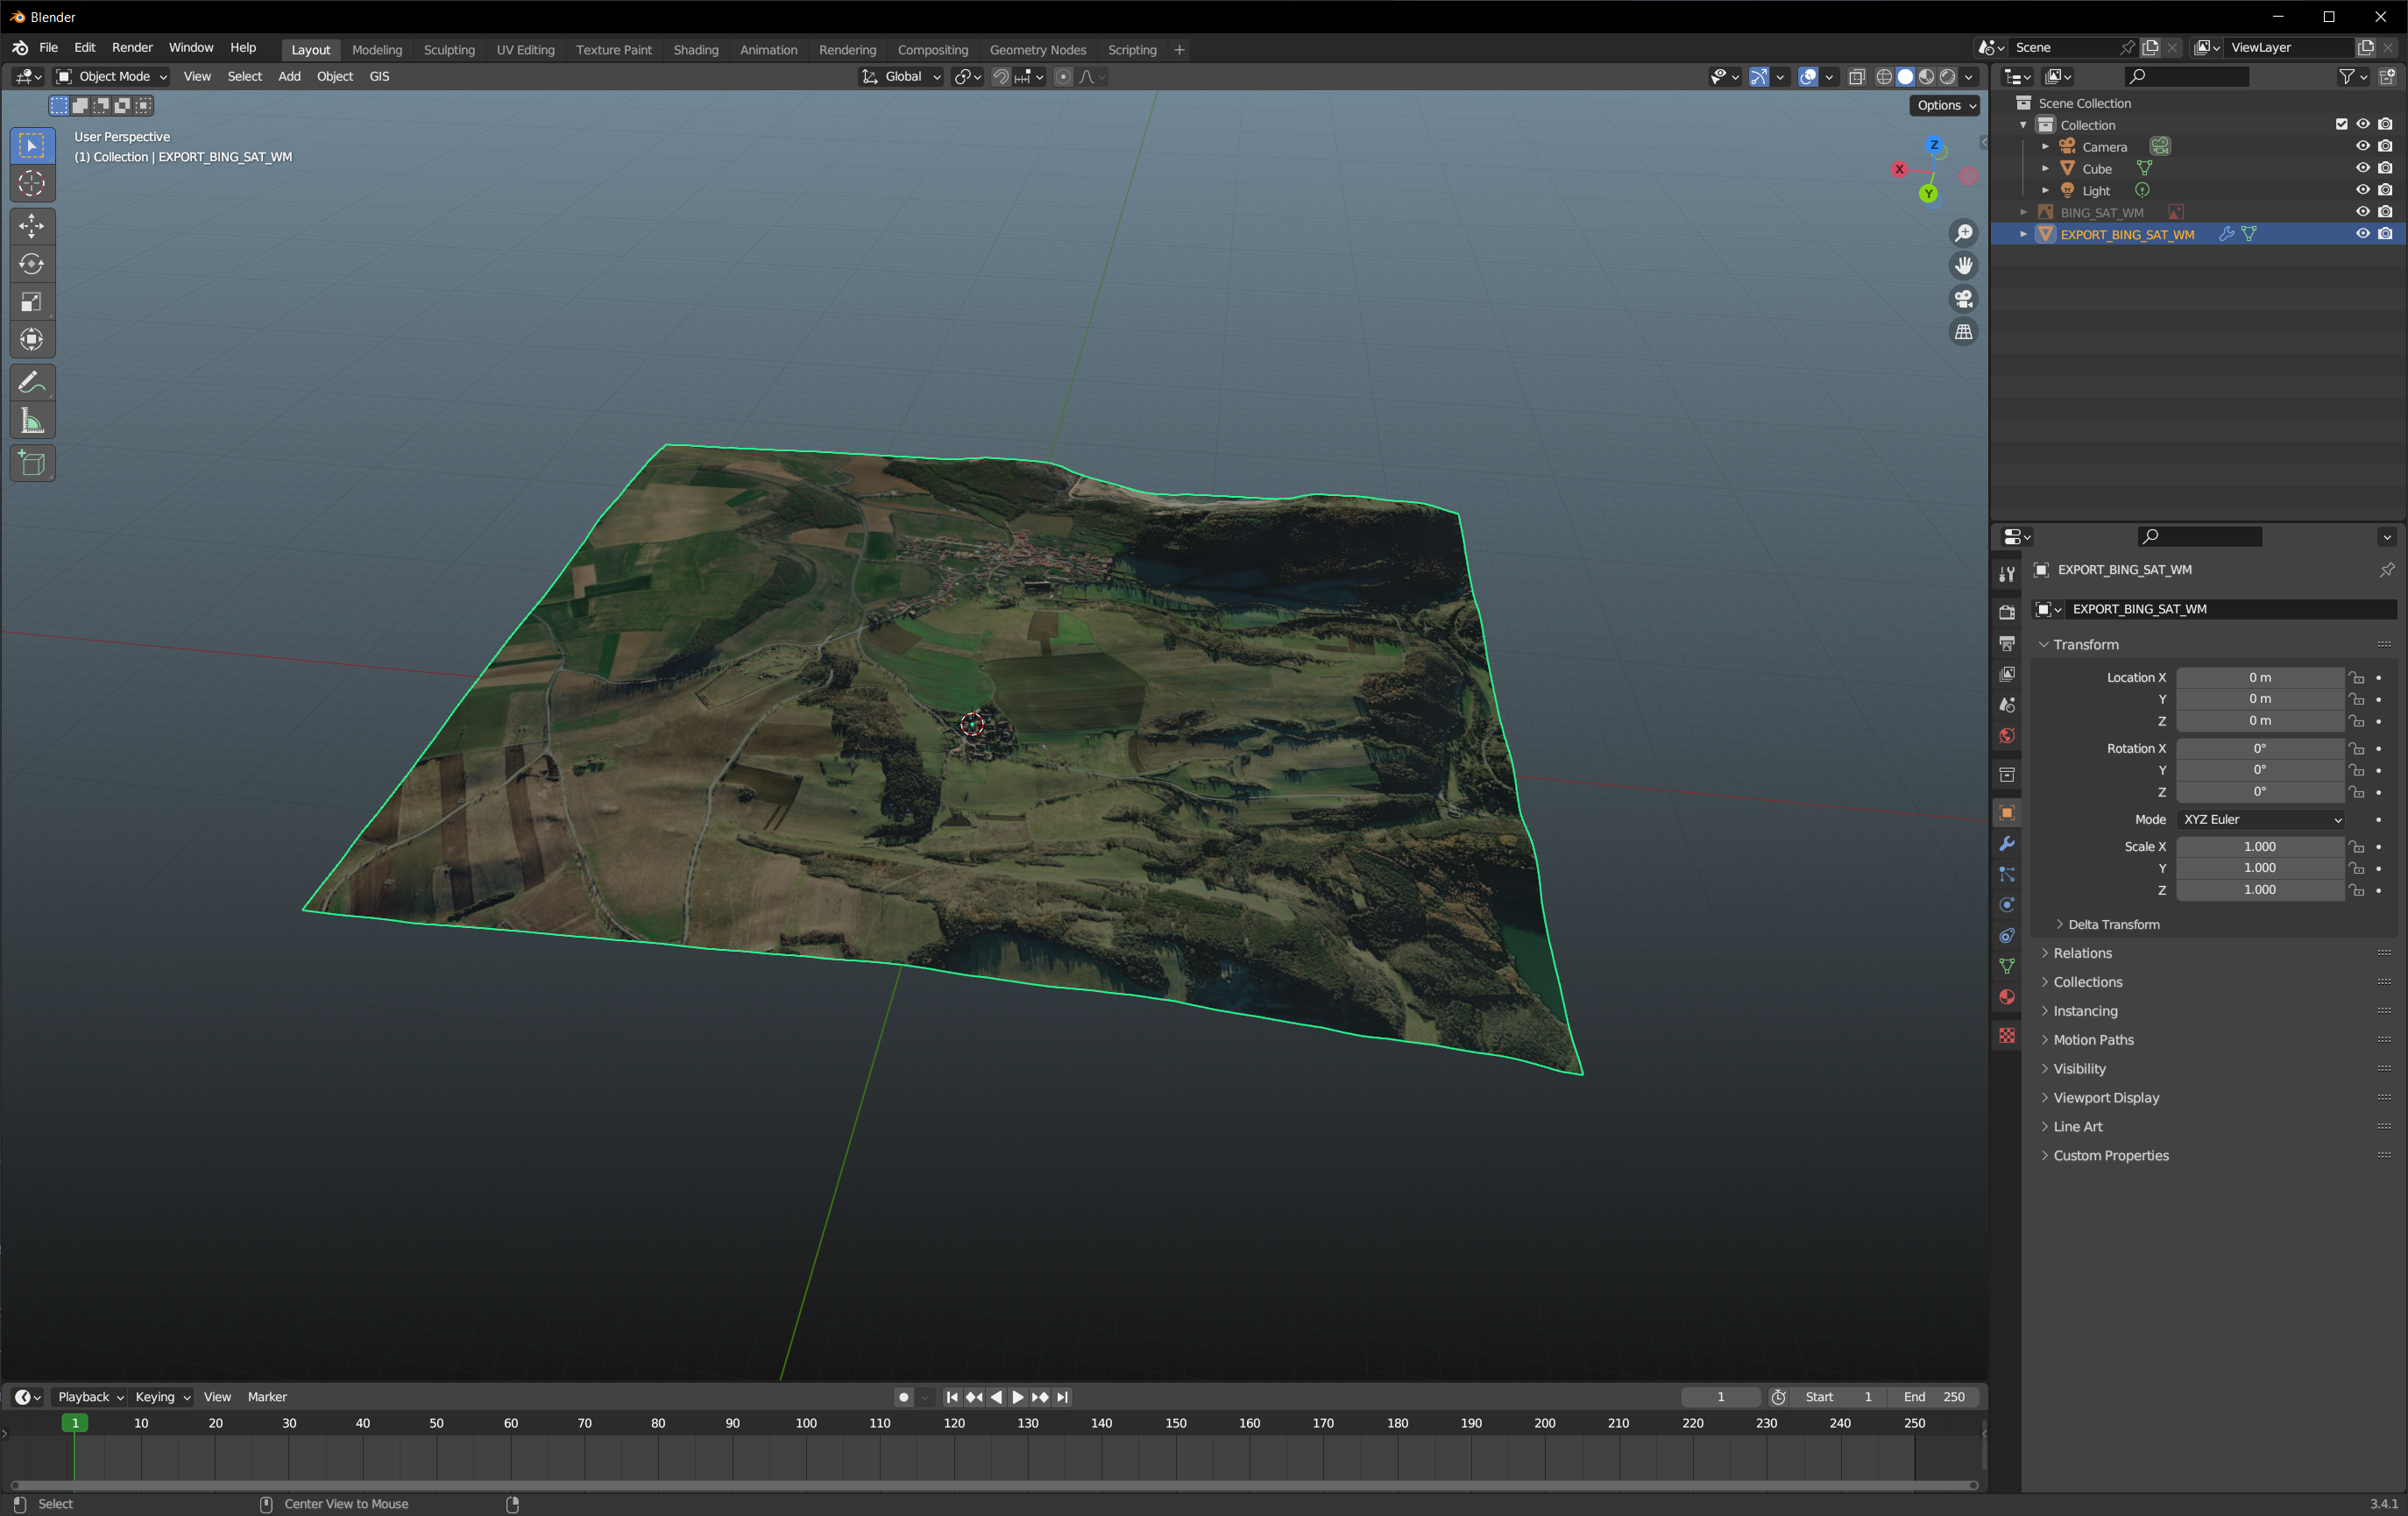
4. Adjusting the elevation
Usually we want to adjust our map model so that its origin is at zero. To do that we:
Apply the modifiers: select the plane object, presss Ctrl+A and select Apply -> Visual Geometry to Mesh 
Now, because the plugin is creating a plane based on the screen ratio, the plane will not be a perfect rectangle. What we can do is:
- Select the plane
- Go to the edit mode
- Select the top view
- Select a vertex that is the closest one to the origin
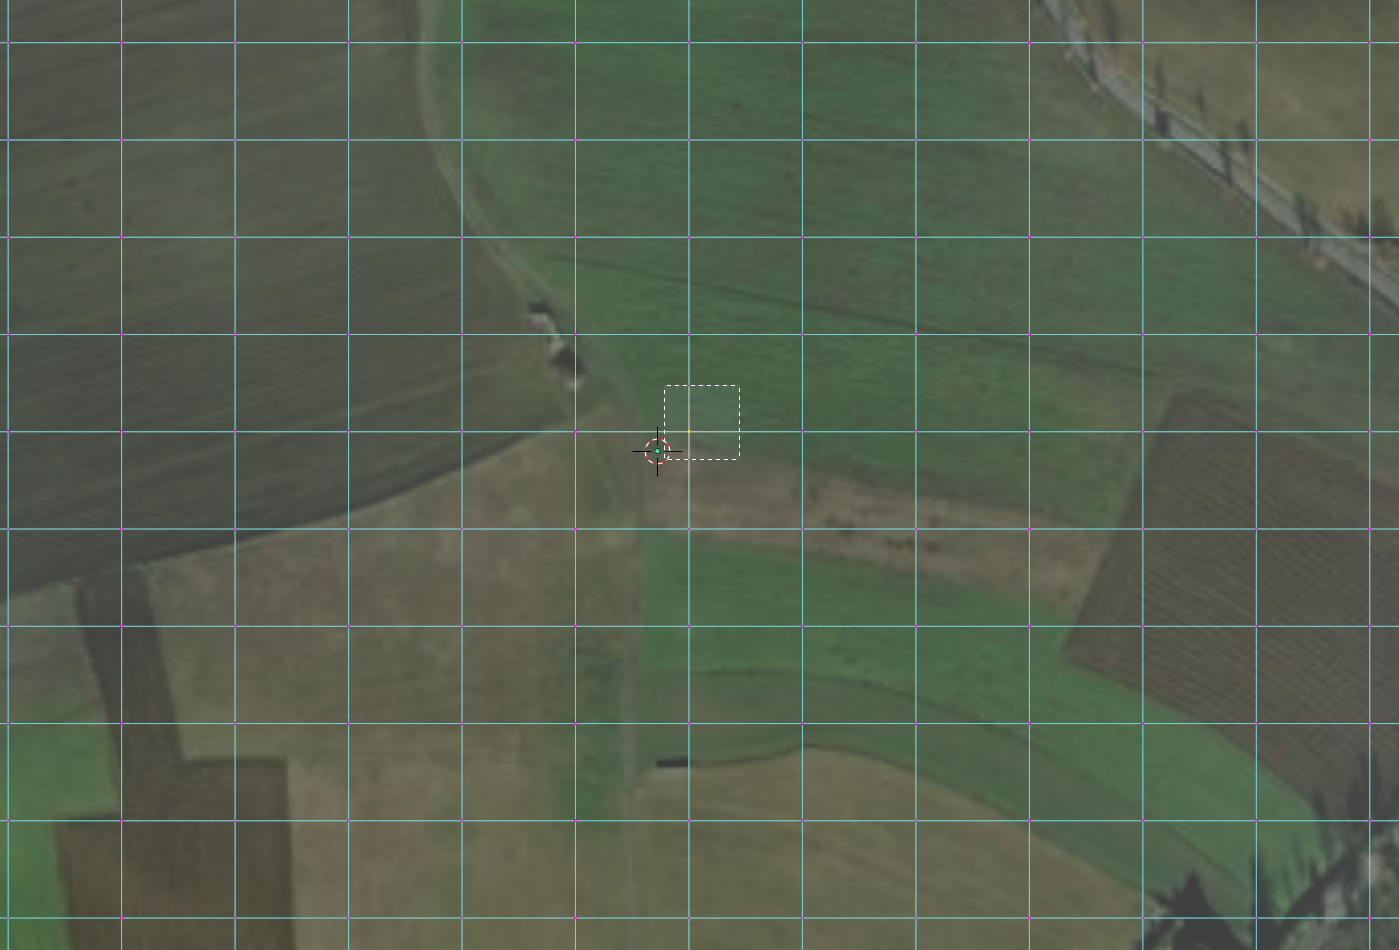
- Now we can see its global coordinates. We want to move all of our vertices so that this point moves to the origin.

- To do that we can copy the
Xposition, then select all vertices (a), then subtract the copied value from the median’sX: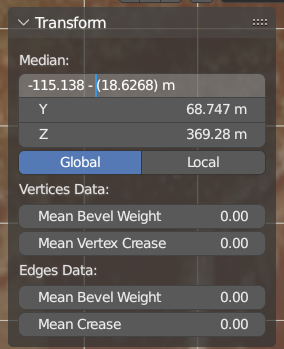
- Repeat the same for the
YandZ.
5. Exporting the model
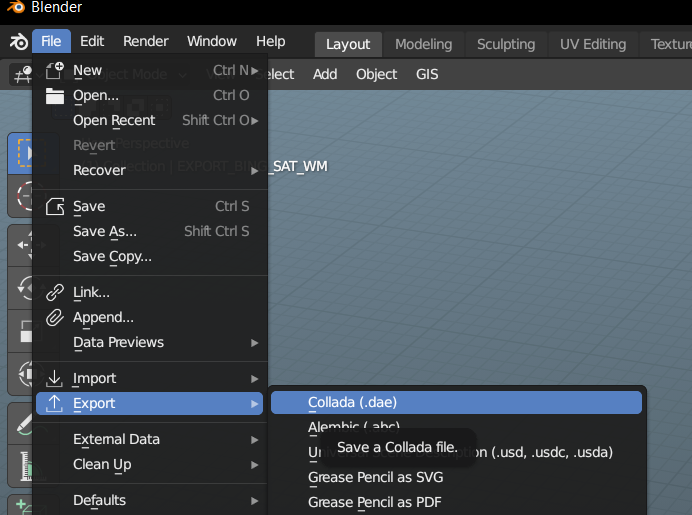
We export our model as Collada .dae file. Select the plane object, go to File -> Export -> Collada (.dae).
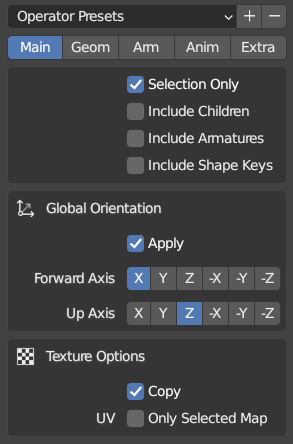
Check Selection Only, check Global Orientation -> Apply, and select X as forward axis and Z as up axis:
Press Export COLLADA and save the file somewhere. There should be two files created: the .dae and the .tif texture.
6. Importing to the Gazebo world.
Create a simple test.world file with the following content:
<?xml version="1.0"?>
<sdf version="1.4">
    <world name="default">
        <include>
            <uri>model://sun</uri>
        </include>
        <model name="myModel">
            <pose>0 0 0 0 0 0</pose>
            <static>true</static>
            <link name="body">
                <visual name="visual">
                    <geometry>
                        <mesh>
                            <uri>file://myModel.dae</uri>
                        </mesh>
                    </geometry>
                </visual>
            </link>
        </model>
    </world>
</sdf>
Place the myModel.dae and the corresponding .tif texture files in the same folder as the test.world file.
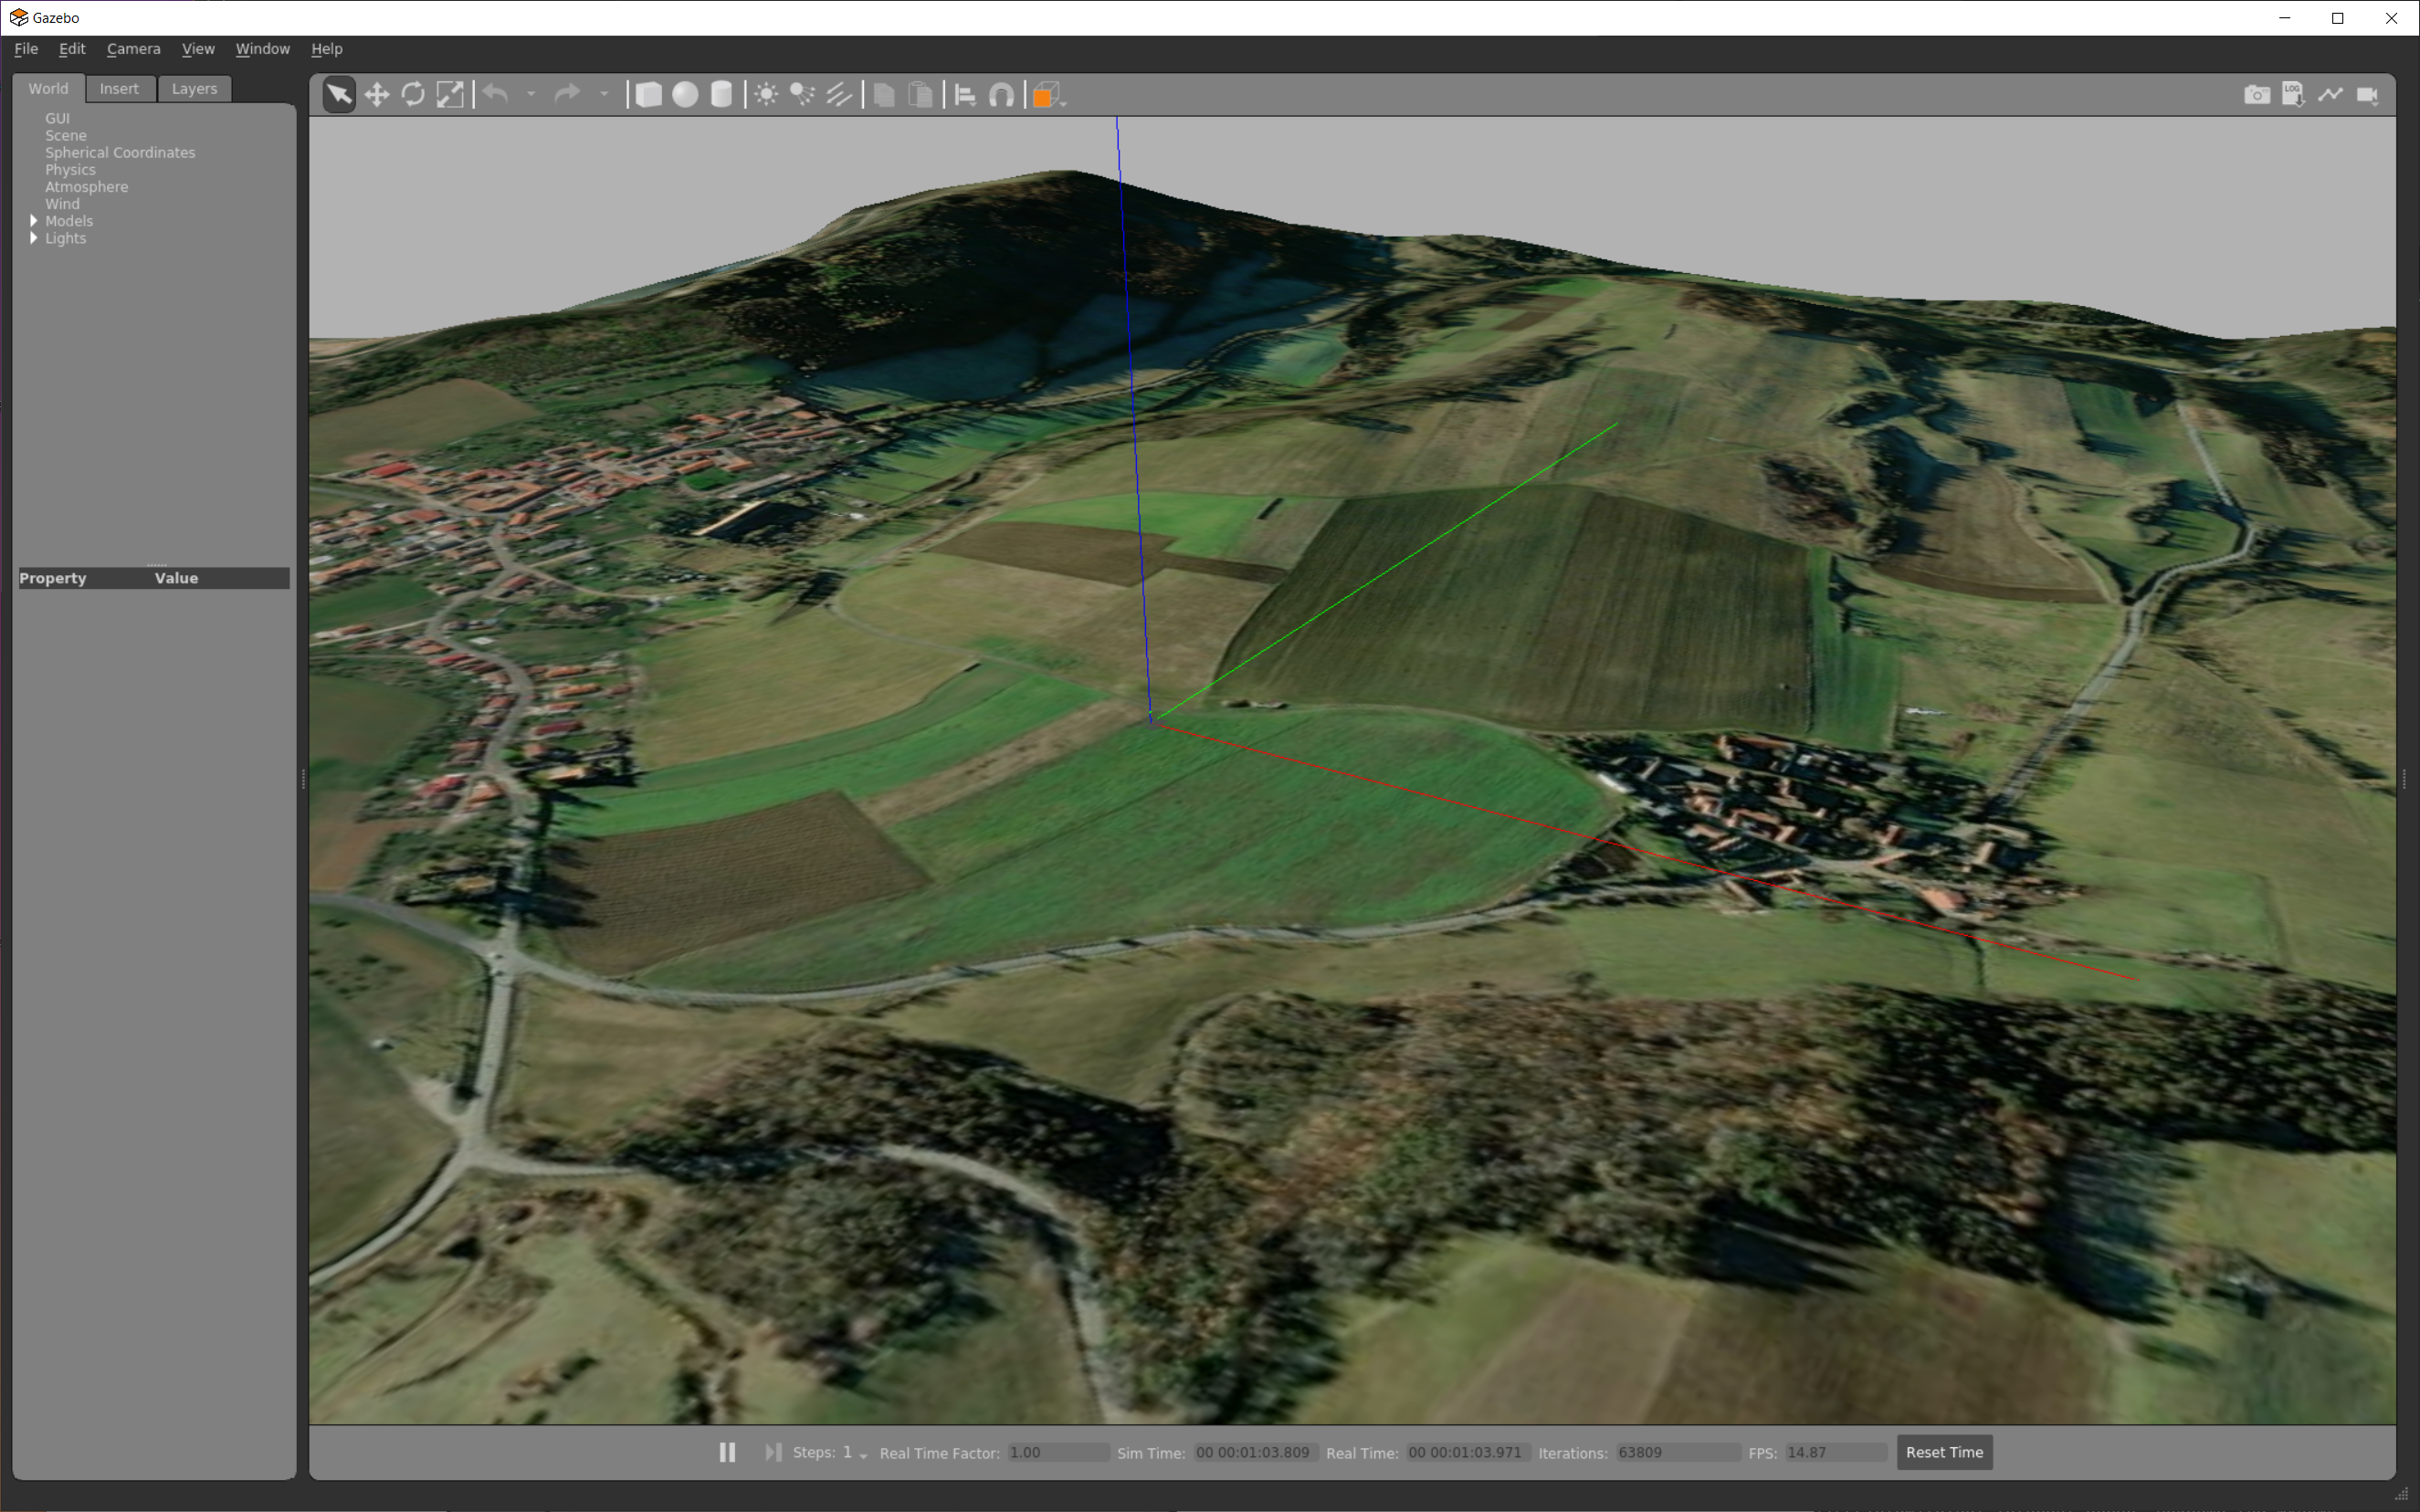
Finally, run Gazebo with the test.world file (you may want to zoom out a bit):
gazebo test.world